Choosing the right fiber optic cable for your home involves considering several factors to ensure you get the best performance for your needs. Here's a step-by-step guide to help you make an informed decision:
1. Understand Your Needs
- Internet Speed Requirements: Determine the internet speed you require. Higher speeds (like those above 1 Gbps) might necessitate higher-quality cables.
- Distance: Consider the distance the fiber optic cable needs to cover. Some cables are better suited for longer distances.
2. Types of Fiber Optic Cables
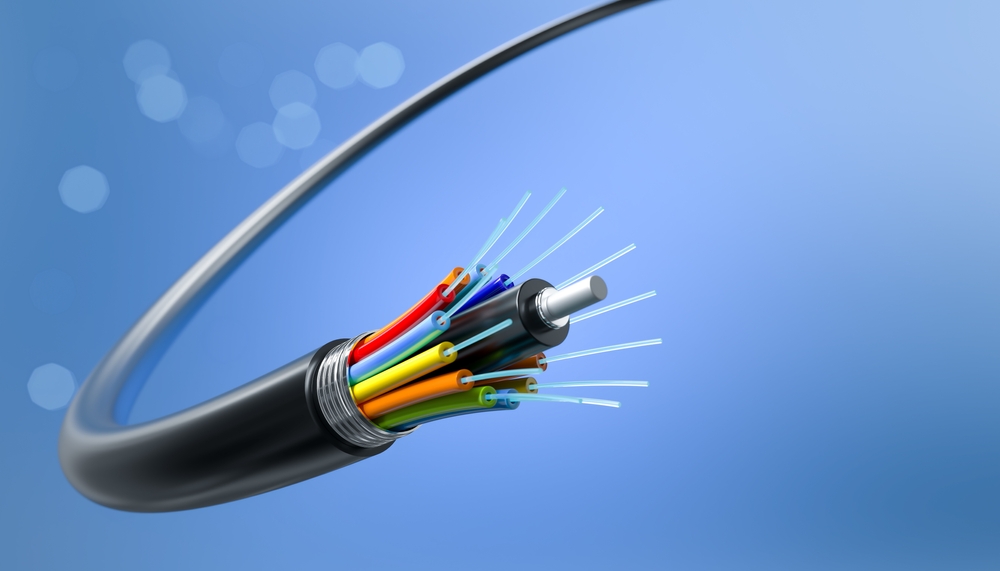
- Single-Mode Fiber (SMF): Ideal for long-distance data transmission. It has a smaller core diameter and transmits data using a single light mode, reducing signal loss over long distances.
- Multi-Mode Fiber (MMF): Suitable for shorter distances, typically within a building or a campus. It has a larger core diameter and can handle multiple light modes, which makes it less expensive but with higher signal loss over long distances.
3. Fiber Optic Cable Specifications
- Core Diameter: Single-mode fibers usually have a core diameter of 8-10 micrometers, while multi-mode fibers typically have core diameters of 50 or 62.5 micrometers.
- Cladding Diameter: Both single-mode and multi-mode fibers commonly have a cladding diameter of 125 micrometers.
- Bandwidth: Ensure the cable supports the bandwidth required for your applications. For example, OM3 and OM4 multi-mode fibers support higher bandwidths and speeds compared to OM1 and OM2.
4. Connector Types
- SC (Subscriber Connector): A common type with a push-pull mechanism.
- LC (Lucent Connector): Smaller than SC, often used in high-density connections.
- ST (Straight Tip): A bayonet-style connector, common in networking environments.
- MTP/MPO: Used for high-density fiber connections, often in data centers.

5. Cable Construction
- Indoor vs. Outdoor Cables: Indoor cables are designed to be used within buildings and are more flexible and easier to install. Outdoor cables are more robust, with additional protection against weather, moisture, and UV radiation.
- Riser (OFNR) vs. Plenum (OFNP) Rated Cables: Riser cables are suitable for vertical runs in building shafts, while plenum cables are required for spaces used for air circulation, like air ducts, due to their lower flammability and smoke production.
6. Future-Proofing
- Choose a cable that supports higher speeds than you currently need to accommodate future upgrades without needing to replace the cabling.
7. Installation Considerations
- Ease of Installation: Consider the flexibility and ease of routing the cable through walls and conduits.
- Durability: Look for cables with strong protective jackets, especially if they will be installed in environments with physical stress.
8. Budget
- While fiber optic cables can be more expensive than traditional copper cables, they offer higher speeds and better performance. Balance your budget with your performance needs.
9. Professional Installation
- If you are not familiar with installing fiber optic cables, consider hiring a professional. Proper installation is crucial for optimal performance and to avoid damage to the cables.
10. Testing and Certification
- Testing Equipment: Ensure you have access to the right testing equipment to verify the integrity and performance of the installed cables. This might include Optical Time Domain Reflectometers (OTDRs), power meters, and light sources.
- Certification Standards: Check that the fiber optic cable and the installation meet relevant industry standards and certifications. This ensures reliability and compatibility with other network components.
11. Environmental Considerations
- Temperature Range: Ensure the cable can operate effectively within the temperature ranges of your installation environment. Extreme temperatures can affect performance and durability.
- Moisture Resistance: For outdoor or damp environments, choose cables with adequate moisture protection, such as water-blocking gel or tape.
12. Maintenance and Troubleshooting
- Accessibility: Plan for easy access to the cables for maintenance and troubleshooting. This might involve using conduits or trays for easy routing and identification.
- Labeling: Clearly label all cables and connectors to facilitate future maintenance and troubleshooting.
13. Compatibility with Existing Infrastructure
- Check for Compatibility: Ensure that the new fiber optic cables are compatible with your existing network infrastructure, including routers, switches, and other networking equipment.
- Adapters and Converters: If necessary, use appropriate adapters or converters to integrate fiber optic cables with older copper-based systems.
14. Supplier and Warranty
- Reputable Suppliers: Purchase cables from reputable suppliers to ensure quality and reliability.
- Warranty: Check for warranties and support options provided by the manufacturer. This can be crucial if you encounter any issues with the cables after installation.
15. Safety Considerations
- Proper Handling: Handle fiber optic cables with care to avoid damage. Fiber strands are delicate and can break if mishandled.
- Safety Gear: Use appropriate safety gear, such as gloves and eye protection, when handling and installing fiber optic cables.
16. Environmental Impact
- Eco-Friendly Options: Consider choosing eco-friendly cables that have minimal environmental impact in their manufacturing and disposal processes.
Practical Tips for Home Installation
- Plan Your Layout: Before purchasing cables, map out your home network layout. Determine where your modem, router, and other network devices will be located.
- Measure Twice, Cut Once: Accurately measure the distances between devices to ensure you purchase the correct cable lengths.
- Use Conduits: Run cables through conduits or protective tubing to protect them from physical damage and make future upgrades easier.
- Avoid Bending: Fiber optic cables have a minimum bend radius. Avoid sharp bends to prevent damage and signal loss.
- Secure Cables Properly: Use cable ties or clips to secure cables neatly along walls or in cabinets.
Detailed Steps for Installation
- Preparation and Planning
- Assess the Space: Evaluate the physical space where the cables will be installed. Identify potential obstacles like walls, floors, and ceilings.
- Tools and Materials: Gather necessary tools such as cable cutters, strippers, crimping tools, fish tape, and a fiber optic fusion splicer if you plan to do splicing.
- Cable Routing
- Identify Pathways: Plan the pathway for the cables to avoid electrical interference and physical damage. Use existing conduits or create new ones if necessary.
- Avoid Interference: Keep fiber optic cables away from electrical cables and devices that could cause electromagnetic interference.
- Running the Cable
- Use Conduits and Trays: Install conduits and cable trays where needed to protect the fiber optic cables and keep them organized.
- Pulling the Cable: When pulling the cable through conduits, use a fish tape to guide it, ensuring you do not exceed the cable’s tension limits.
- Terminating the Cable
- Connector Attachment: Attach the appropriate connectors (SC, LC, ST, etc.) to the ends of the fiber optic cables using the correct termination kit and method.
- Fusion Splicing: If necessary, perform fusion splicing to join two fiber optic cables. This requires precision equipment and should be done carefully to ensure low signal loss.
- Testing and Verification
- Visual Inspection: Inspect the installed cables and connections to ensure there are no visible damages or improper connections.
- Performance Testing: Use tools like OTDRs and power meters to test the signal strength, continuity, and overall performance of the fiber optic network. Address any issues detected during testing.
- Securing and Labeling
- Secure Cables: Use cable ties or clamps to secure the fiber optic cables along their pathways, avoiding tight bends and kinks.
- Label Connections: Clearly label both ends of each cable and each connection point. This helps in future maintenance and troubleshooting.
- Final Review and Documentation
- Double-Check Installations: Review the entire installation to ensure all cables are properly secured, terminated, and tested.
- Documentation: Create a detailed record of the installation, including cable lengths, types, pathways, and test results. This documentation will be invaluable for future upgrades or repairs.

Troubleshooting Common Issues
- Signal Loss
- Dirty Connectors: Clean the fiber optic connectors using appropriate cleaning tools and solutions.
- Bend Radius Violation: Check for and correct any bends in the cable that exceed the manufacturer’s recommended bend radius.
- Poor Splicing: Inspect and redo any splices that may be causing excessive signal loss.
- Intermittent Connection
- Loose Connections: Ensure all connectors are securely attached and properly seated in their respective ports.
- Physical Damage: Inspect the cable for any physical damage or kinks that might cause intermittent issues.
- No Signal
- Faulty Equipment: Verify that all networking equipment (modems, routers, switches) are functioning correctly.
- Broken Fiber: Use an OTDR to locate any breaks in the fiber optic cable and perform repairs as necessary.
Maintenance Tips
- Regular Inspections
- Periodically inspect the fiber optic network for any signs of wear and tear, physical damage, or environmental impact.
- Cleaning
- Regularly clean the connectors and ports using fiber optic cleaning tools to maintain optimal performance.
- Monitoring
- Use network monitoring tools to keep an eye on the performance of your fiber optic network and identify any potential issues early.
