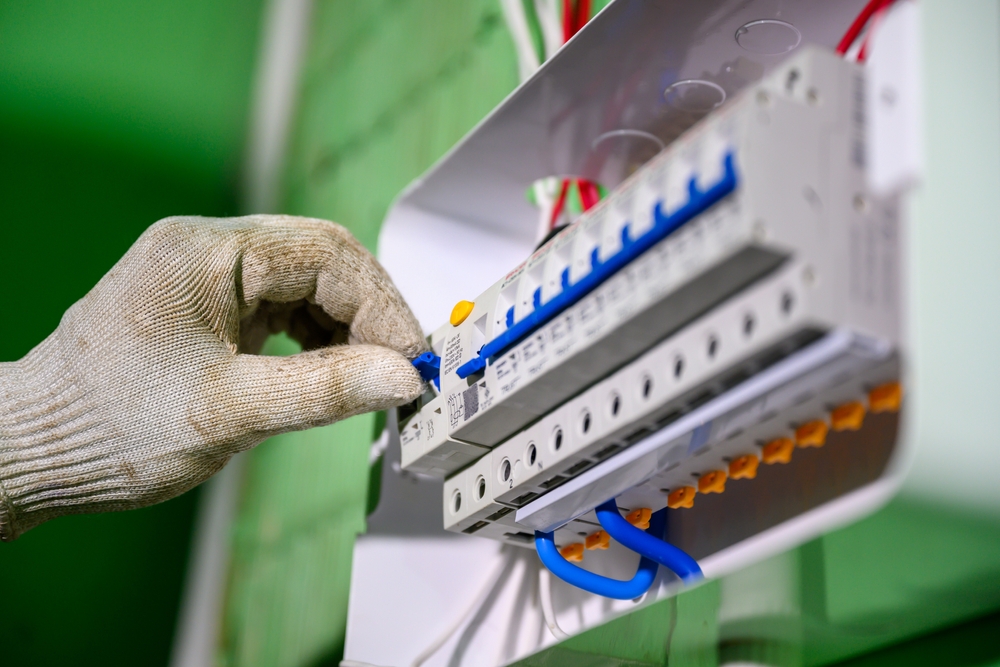
A subpanel, also known as a sub-distribution board, is an auxiliary panel that extends the capacity and organization of your main electrical service panel. Installing a subpanel can be a strategic move for managing your electrical system efficiently. Here's an overview of when and why you might need one:
When You Need a Subpanel
- Home Additions or Renovations
- Expansion: If you’re adding a room, garage, or workshop, a subpanel can supply power to the new area without overloading the main panel.
- Convenience: It allows you to control the electrical service of the new area from a local point rather than from the main panel.
- High-Powered Appliances or Systems
- Dedicated Circuits: Large appliances like HVAC systems, hot tubs, or electric car chargers often require dedicated circuits. A subpanel can provide these circuits without overwhelming the main panel.
- Future-Proofing: If you anticipate needing additional high-powered appliances, a subpanel can offer the extra circuits you’ll need.
- Circuit Overload on Main Panel
- Capacity Limits: Older homes with outdated electrical systems may have panels that are maxed out. Installing a subpanel can help manage the load more effectively.
- Code Compliance: Modern electrical codes often require more circuits than older panels can accommodate. A subpanel helps meet these requirements.
- Distance from Main Panel
- Remote Locations: If a part of your property is far from the main panel, such as a detached garage or a shed, a subpanel located nearer to that area can reduce the amount of wiring and voltage drop.
- Efficiency: It’s more efficient and sometimes safer to run a subpanel close to the area of high demand.
Why You Need a Subpanel
- Enhanced Electrical Distribution
- Load Management: Subpanels help in better distribution of electrical loads, preventing overloads on the main panel and reducing the risk of tripped breakers.
- Safety: Proper load distribution minimizes the risk of electrical fires and enhances overall system safety.
- Increased Circuit Capacity
- More Circuits: A subpanel allows you to add more circuits than your main panel can support, accommodating additional electrical needs without a complete panel upgrade.
- Flexibility: You gain the flexibility to expand your electrical system as needed.
- Convenience and Control
- Localized Control: Subpanels offer a localized point of control for specific areas, making it easier to shut off power to certain sections without affecting the entire home.
- Maintenance: They simplify maintenance and troubleshooting by isolating electrical issues to specific areas.
- Improved Organization
- Tidier Wiring: Subpanels help in organizing electrical wiring by reducing clutter in the main panel.
- System Segmentation: They enable segmentation of electrical systems, which can simplify future upgrades and repairs.
- Cost-Effective Solution
- Avoid Full Upgrade: Installing a subpanel can be a more cost-effective solution than replacing an entire main panel, especially if the main panel is in good condition.
- Incremental Upgrades: It allows for incremental upgrades to your electrical system, spreading out costs over time.
Considerations for Installing a Subpanel
When deciding to install a subpanel, there are several important considerations to ensure a safe and effective setup:
1. Electrical Load Calculation
- Assess Total Load: Calculate the total electrical load to determine if your main panel can support a subpanel. Consider the power requirements of existing circuits and any new appliances or systems.
- Professional Assessment: It’s often best to have a licensed electrician perform a load calculation to ensure accuracy and compliance with local electrical codes.
2. Subpanel Location
- Accessibility: Choose a location that is easily accessible for maintenance and emergencies. It should be in a dry, cool area with sufficient clearance around the panel.
- Proximity to Load: Position the subpanel as close as possible to the area it will serve to minimize wiring costs and voltage drop.

3. Panel Size and Type
- Amperage Rating: Select a subpanel with an appropriate amperage rating based on your calculated electrical load. Common ratings include 60-amp, 100-amp, and 125-amp panels.
- Circuit Breaker Slots: Ensure the subpanel has enough circuit breaker slots for current and future needs. Oversizing slightly can provide flexibility for future expansion.
4. Wiring and Conduit
- Wire Gauge: Use the correct gauge wire for the subpanel’s amperage. For example, a 60-amp subpanel typically requires 6-gauge wire, while a 100-amp subpanel might need 4-gauge wire.
Conduit Type: Select appropriate conduit to protect the wiring. Options include non-metallic (NM) cable for indoor installations or underground feeder (UF) cable for exterior runs.
5. Grounding and Bonding
- Separate Ground and Neutral: In a subpanel, the neutral and ground buses must be separate. This is crucial to avoid electrical faults and ensure safe operation.
- Grounding Electrode System: Depending on local codes, you might need to install a separate grounding electrode system for the subpanel, such as ground rods.
6. Permits and Inspections
- Building Permits: Obtain necessary permits before starting the installation. Regulations vary by location, so check with your local building department.
- Inspections: Schedule inspections as required to ensure the installation meets all safety and code requirements. This helps prevent future issues and potential hazards.
Benefits of a Properly Installed Subpanel
A well-installed subpanel can provide numerous benefits, making it a worthwhile investment for many homeowners:
1. Increased Safety
- Load Balancing: Proper load distribution reduces the risk of overloading circuits, which can prevent electrical fires and equipment damage.
- Compliance with Codes: Meeting current electrical codes ensures that your system is safe and up to standard.
2. Enhanced Functionality
- Dedicated Circuits: Subpanels allow for dedicated circuits for specific areas or high-demand appliances, improving the functionality and reliability of your electrical system.
- Localized Control: With localized circuit breakers, you can easily manage power in specific areas without affecting the entire home.
3. Future Expansion
- Scalability: Subpanels provide a scalable solution for future electrical needs. Whether adding new appliances or expanding living spaces, a subpanel offers the capacity for growth.
- Ease of Upgrade: Future electrical upgrades or renovations are simplified with a subpanel, as it offers extra circuit slots and easier access.
Steps to Install a Subpanel
If you’ve decided that a subpanel is the right solution for your electrical needs, here’s a step-by-step overview of the installation process. Remember, while this guide provides an outline, hiring a licensed electrician is highly recommended to ensure safety and compliance with local codes.
1. Plan the Installation
- Determine Location: Select a suitable location for the subpanel that is accessible and near the area it will serve.
- Assess Load Needs: Calculate the electrical load to determine the appropriate size and capacity of the subpanel.
- Obtain Permits: Apply for necessary permits from your local building department.
2. Gather Materials and Tools
- Subpanel: Choose a subpanel with enough circuit breaker slots and the appropriate amperage rating.
- Circuit Breakers: Purchase the correct type and number of circuit breakers for your subpanel.
- Wire: Get the appropriate gauge wire for the subpanel’s amperage (e.g., 6-gauge for 60-amp, 4-gauge for 100-amp).
- Conduit: Select the right type of conduit (e.g., non-metallic for indoor, UF cable for outdoor).
- Grounding Equipment: If required, get grounding rods and other grounding materials.
- Tools: Gather tools such as screwdrivers, pliers, wire strippers, a voltage tester, and a drill.
3. Shut Off Power
- Main Panel: Turn off the main breaker to cut power to the entire house. Verify with a voltage tester to ensure there is no power flowing.
4. Install the Subpanel
- Mount the Subpanel: Secure the subpanel to the wall at the chosen location.
- Run the Conduit and Wire: Run the appropriate conduit and wire from the main panel to the subpanel. Make sure the wire is correctly rated for the amperage and distance.
- Connect Wires: Connect the feeder wires to the main panel and the subpanel. This typically involves connecting the hot wires to the main breaker in the subpanel, the neutral wire to the neutral bus, and the ground wire to the ground bus.
5. Separate Neutral and Ground Buses
- Neutral and Ground Separation: Ensure the neutral bus and ground bus are separate in the subpanel. This is crucial for proper operation and safety.
6. Install Circuit Breakers
- Circuit Breaker Installation: Install the appropriate circuit breakers in the subpanel, making sure each circuit is connected to its respective breaker.
- Wire the Circuits: Run individual circuits from the subpanel to the areas they will serve, connecting them to the respective breakers.

7. Grounding
- Install Ground Rods: If local codes require, install grounding rods and connect them to the subpanel’s ground bus.
- Bonding: Ensure proper bonding of the ground bus to the grounding system.
8. Final Checks and Inspections
- Double-Check Connections: Verify all connections are secure and correct.
- Inspect Work: Have the installation inspected by a local building inspector to ensure it meets code requirements.
- Restore Power: Once the installation is approved, restore power by turning on the main breaker and then the subpanel breakers.
Tips for Safe Installation
- Always Turn Off Power: Ensure power is off before starting any electrical work.
- Use Proper Tools and Equipment: Ensure all tools and materials are rated for the work you are doing.
- Follow Local Codes: Adhere to local electrical codes and regulations for safety and compliance.
- Consult a Professional: If in doubt, consult or hire a licensed electrician.
